
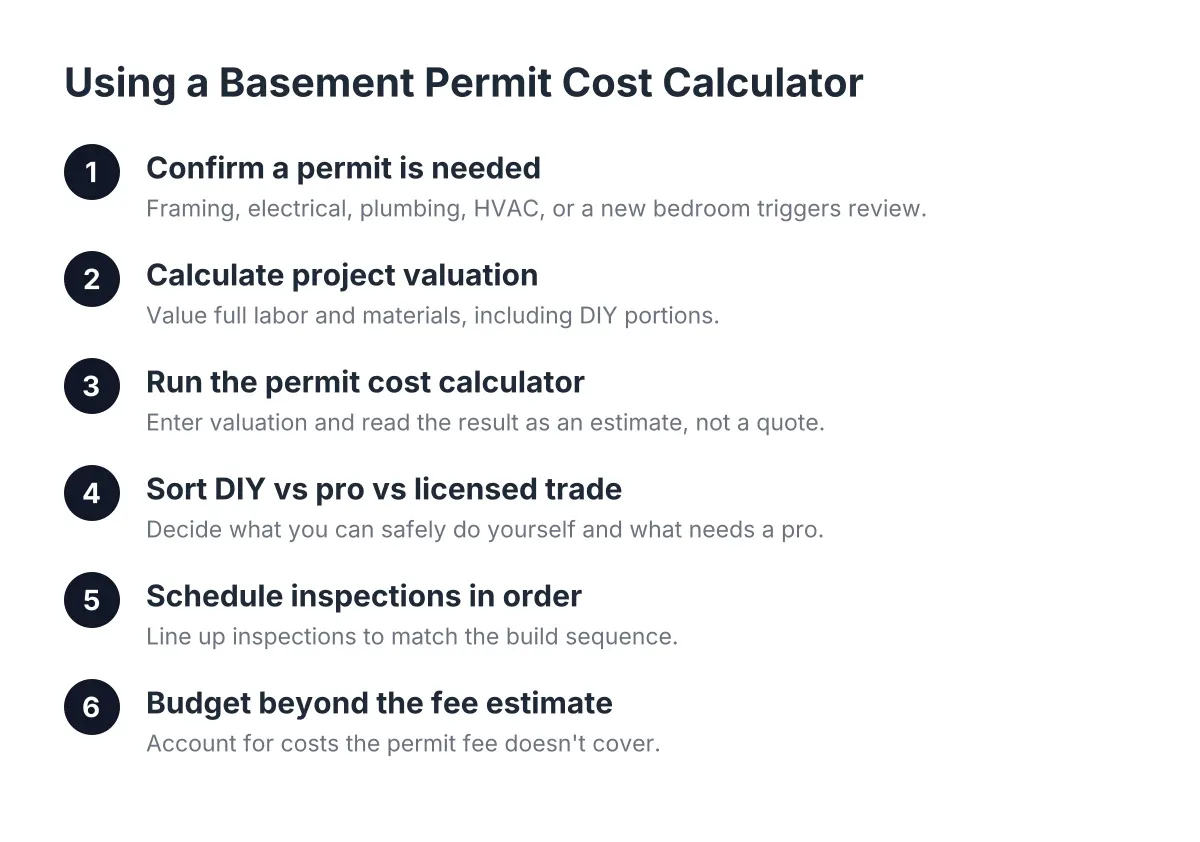
Building Permit Cost Calculator Guide for Aurora Basement Remodels
If you are pricing out a basement finish in Aurora, a building permit cost calculator is one of the first tools you should reach for, and one of the most misunderstood. Most homeowners find a fee calculator on some city website, punch in a number, and either panic or shrug. The problem is not the calculator. The problem is that nobody explains what number to put in, what the fee actually covers, and which parts of the project trigger inspections. This guide walks you through the process step by step, the way a contractor would explain it at your kitchen table, including a plain checklist of what you can safely do yourself and what needs a licensed pro.
One thing up front: permit fees are a small slice of your total project cost. But getting the permit side wrong, by skipping it or valuing the work incorrectly, is one of the fastest ways to blow a budget. Failed inspections mean tear-out and rework. Unpermitted work can stall a home sale or kill a rental plan. If you are planning to rent out the finished space, a legal bedroom with a compliant egress window is not optional. So let's do this in order.
Step 1: Confirm That Your Basement Finish Needs a Permit
Yes, finishing a basement in Aurora requires a building permit. Any project that adds framing, electrical circuits, plumbing, ductwork, or a new bedroom in previously unfinished space triggers permit review and inspections. Painting, carpet, and simple cosmetic updates in an already-finished basement generally do not.
This trips people up because a basement feels like private space. Nobody sees it. But the moment you frame a wall, run a new circuit, or add a bathroom rough-in, you are changing the building. The city wants a record of it, and future buyers will too.
For a landlord or house-hacker, this step matters double. A basement bedroom is only a legal bedroom if it has a compliant basement escape window. Under the IRC 2024 code, every basement sleeping room needs an emergency escape and rescue opening with at least 5.7 square feet of net clear opening, according to EgressUSA. That opening also has strict dimensions: a maximum sill height of 44 inches above the finished floor and a minimum net clear width of 20 inches, according to The Great Egress Co. No permit and no egress window means no legal rental bedroom, no matter how nice the drywall looks.
Step 2: How to Calculate Project Valuation for the Permit Cost Calculator
Every building permit cost calculator asks for one main input: the valuation of the work. That means the total value of labor and materials for the project, not just what you personally plan to spend out of pocket. If you frame the walls yourself, the city still values that framing as if a contractor did it.
Here is why this step matters for a budget-first planner. Permit fees scale with valuation. Lowball the valuation and you risk the city adjusting it upward, delaying your permit, or flagging the project. Inflate it and you pay more in fees than you need to. A defensible number comes from an itemized scope: framing, electrical, plumbing, HVAC, insulation, drywall, trim, flooring, and the egress window.
Speaking of trim, budget more of it than you expect. A finished basement often carries far more baseboard, casing, and paneling than a typical room, because you are trimming every wall, window well, and bulkhead you build. Homeowners routinely underestimate this line and then wonder why quotes vary.
For example, suppose a homeowner in an Aurora rental-heavy zip code plans an 800 square foot basement finish with one bedroom, one bathroom, and a new egress window, aiming to rent it as a mother-in-law suite. Her permit valuation should reflect the full scope, even the work she plans to do herself. In that scenario, the permit fee is a rounding error next to the project, but the inspections attached to it are what make the bedroom legal and the rent collectible.
Step 3: Run the Permit Cost Calculator Correctly to Get an Accurate Fee
Running a building permit cost calculator correctly means entering your full project valuation, selecting a residential remodel or basement finish category, and reading the output as a fee estimate, not a quote. The calculator returns the city's fee based on your declared value; the final fee is set at plan review.
You will notice these tools exist for cities everywhere, from Colorado's Pikes Peak region to Tampa, and even versions like a building permit fee calculator for Calgary or a building permit cost calculator for California or NJ. They all work the same way: valuation in, fee out. What none of them tell you is whether your plans will pass review. That part depends on your drawings, your egress window sizing, and your trade work.
A few practical tips when you run the numbers:
- Enter the full valuation, labor plus materials, even for DIY portions.
- Note whether electrical, plumbing, and mechanical permits are separate line items; trade permits often are.
- Save or screenshot the estimate; it helps when you compare contractor quotes later.
- Treat the output as one line in your budget, not the budget itself.
The real value of the exercise is not the fee. It is that building a defensible valuation forces you to write an itemized scope, which is exactly what protects you from surprise change orders later.
Step 4: Sort the Work Into DIY, Pro, and Licensed-Trade Buckets
Not every part of a permitted basement finish requires a licensed contractor. Sorting the work honestly is where a budget-first planner saves real money without risking a failed inspection. Here is the checklist most contractors would give you.
Usually safe for a capable DIYer, under your homeowner permit:
- Demolition and cleanup of unfinished space
- Framing walls and soffits
- Hanging insulation after the rough-in inspections pass
- Drywall, paint, trim, and flooring
Hire a licensed pro, full stop:
- Electrical: new circuits, panel work, and anything behind the walls
- HVAC: extending ductwork or adding returns to the basement
- Plumbing: bathroom rough-ins and drain work
- Structural cuts in the foundation for a new egress window
Electrical deserves a word. Homeowners sometimes assume basement wiring is simple. It is not, and the code details are unforgiving. Running Romex inside EMT conduit is against code in damp or wet locations, according to the National Electrical Code (NFPA 70). Details like that are why an electrical rough-in inspection exists, and why most contractors recommend a licensed electrician even when the homeowner handles framing and finish work.
The egress window is the other line you should not cross alone. Cutting a foundation wall involves structural support, waterproofing, and exact opening dimensions. Get the egress window sizing wrong by an inch and the inspector can fail the bedroom. Worse, if the framing is already finished, adding structural reinforcement later can mean tearing out finished walls, reframing, and re-trimming around new steel.
Step 5: Schedule Inspections in the Right Order
Basement finish inspections follow a strict sequence, and the two that catch most homeowners are the electrical rough-in inspection and the insulation inspection. Rough-in happens after wiring, plumbing, and ductwork are installed but before insulation goes in. The insulation inspection follows, and only then can drywall go up.
Cover your wiring with insulation before the rough-in passes and you will pull it all back out. Hang drywall before the insulation inspection and you may cut open finished walls. Sequence errors are the single most expensive category of permit mistake, because the fix is always tear-out.
Moisture is worth checking before you close anything up. More than 60 percent of U.S. homes with basements experience some degree of water penetration or moisture problems, according to the American Society of Home Inspectors. An inspector will not always catch a damp wall, but your drywall will, six months later. Address water first; it is cheaper than redoing a finished basement.
Step 6: Budget for What the Permit Fee Estimate Leaves Out
A permit fee calculator output leaves out plan review surcharges, separate trade permits, re-inspection fees if something fails, and the cost of drawings if your project needs them. Build a cushion for these into your budget from day one, alongside the permit fee itself.
However, do not let the permit line scare you off the project. A national basement remodel returns 71 percent of its cost at resale on average, the highest ROI among newly tracked project categories in the 2025 Cost vs. Value Report, according to JLC (Journal of Light Construction) Cost vs. Value Report. The honest trade-off: that return holds best when the finish is done well and fully permitted. A cheap, unpermitted finish can subtract value at resale, because buyers and their lenders treat undocumented square footage as a liability. That is the quiet cost no fee calculator shows.
One more timing note for 2026: if material prices are spiking when you get your quotes, waiting a season for prices to stabilize can beat starting mid-spike. A permit application can usually wait; a bad budget cannot be un-signed.
Step 7: Vet Contractors on Permits Before You Compare Prices
Before comparing dollar figures, ask each contractor three questions: Who pulls the basement remodeling permits, you or me? Which inspections are included in your price, and who attends them? How will you handle egress window sizing and code compliance for the bedroom?
A fair quote answers all three in writing, with an itemized scope that matches the valuation you built in Step 2. Wildly different quotes usually mean wildly different scopes, not one honest bid and one gouger. If a contractor suggests skipping the permit to save money, walk away; you now know exactly what that shortcut costs at inspection time and at resale.
Some situations call for a pro before you even run the numbers: a low ceiling basement that may need floor or mechanical rework, visible water intrusion, or any plan to cut the foundation for a basement escape window. Those variables change both the scope and the permit path, and a local walkthrough beats any calculator.
If you are in Aurora and want a real number instead of a national average, that is what a free estimate is for. A local basement finishing contractor can walk your space, build the itemized scope, handle the permit paperwork, and size the egress window to code, so the number you take to the city, and to your budget spreadsheet, is one you can actually trust.
If you need basement finishing, Aurora Basement Finishing Pros can help.
Prefer to talk it through? Call (720) 973-5727 — a quick call is usually the fastest way to get a straight answer for your situation.